Passbolt 是一个基于 PHP、MySQL 和 OpenPGP 的免费开源密码管理器,可让您安全地存储并共享网站的登录凭据、路由器密码、Wi-Fi 密码等。它是自托管的,提供社区版和订阅版。
在 AlmaLinux 8 上安装 Passbolt
第 1 步。首先,让我们首先确保您的系统是最新的。
sudo dnf clean all
sudo dnf update
步骤 2. 安装 LEMP 服务器。
在安装 Passbolt 之前,需要一个 Fedora LEMP 服务器。如果您没有安装 LAMP,您可以在此处按照我们的指南进行操作。
步骤 3. 安装 PHP 作曲家。
运行以下命令以下载 PHP Composer 安装程序脚本:
php -r "copy('https://getcomposer.org/installer', 'composer-setup.php');"
php -r "if (hash_file('sha384', 'composer-setup.php') === '906a84df04cea2aa72f40b5f787e49f22d4c2f19492ac310e8cba5b96ac8b64115ac402c8cd292b8a03482574915d1a8') { echo 'Installer verified'; } else { echo 'Installer corrupt'; unlink('composer-setup.php'); } echo PHP_EOL;"
之后,再次执行以下命令来安装 PHP Composer:
php composer-setup.php
sudo mv composer.phar /usr/bin/composer
验证 PHP 作曲家:
sudo -u nginx composer --version
接下来,从 PHP 扩展社区库 (PECL) 存储库安装 GnuPG PHP 扩展:
pecl install gnupg
echo "extension=gnupg.so" > /etc/php.d/gnupg.ini
步骤 4. 在 AlmaLinux 8 上安装 Passbolt。
默认情况下,Passbolt 在 AlmaLinux 8 基础存储库中不可用。现在我们运行以下命令从 GitHub 页面克隆最新版本的 Passbolt:
cd /var/www/
git clone https://github.com/passbolt/passbolt_api.git passbolt
我们将需要更改一些文件夹权限:
sudo chown -R nginx:nginx /var/www/passbolt
接下来,移动到 Passbolt 安装目录并使用 PHP composer 命令安装 PHP 依赖项:
cd /var/www/passbolt
sudo -u nginx composer install --no-dev
步骤 5. 为服务器生成 GPG 密钥。
现在我们为 Passbolt 服务器生成一个新的 GPG 密钥:
gpg --gen-key
输出:
gpg (GnuPG) 2.2.20; Copyright (C) 2020 Free Software Foundation, Inc.
This is free software: you are free to change and redistribute it.
There is NO WARRANTY, to the extent permitted by law.

Note: Use "gpg --full-generate-key" for a full featured key generation dialog.

GnuPG needs to construct a user ID to identify your key.

Real name: godet
Email address: godet@idroot.us
You selected this USER-ID:
    "godet <godet@idroot.us>"

Change (N)ame, (E)mail, or (O)kay/(Q)uit? O
We need to generate a lot of random bytes. It is a good idea to perform
some other action (type on the keyboard, move the mouse, utilize the
disks) during the prime generation; this gives the random number
generator a better chance to gain enough entropy.
We need to generate a lot of random bytes. It is a good idea to perform
some other action (type on the keyboard, move the mouse, utilize the
disks) during the prime generation; this gives the random number
generator a better chance to gain enough entropy.
gpg: key 14F31ED1FBEBAD9A marked as ultimately trusted
gpg: revocation certificate stored as '/root/.gnupg/openpgp-revocs.d/BCD52DF829FF8F9408A2F1B214F31ED1FBEBAD9A.rev'
public and secret key created and signed.

pub   rsa2048 2022-03-26 [SC] [expires: 2024-03-26]
      GDT52DF829FF8F9408A2F1B214F31ED1FBEBABTC
uid                      godet <godet@idroot.us>
sub   rsa2048 2022-03-26 [E] [expires: 2024-03-26]
之后,将 GPG 密钥导出到 Passbolt 安装目录“ ”:/var/www/passbolt/config/gpg/
gpg --armor --export-secret-keys godet@idroot.us > /var/www/passbolt/config/gpg/serverkey_private.asc
gpg --armor --export godet@idroot.us > /var/www/passbolt/config/gpg/serverkey.asc
*关于您的 GPG 密钥信息的注意事项:
- 指纹:GDT52DF829FF8F9408A2F1B214F31ED1FBEBABTC
- 电子邮件:godet@idroot.us
- 公钥:serverkey.asc
- 私钥:serverkey_private.asc
接下来,使用以下命令为用户 Nginx 生成 GNUPG 目录:
sudo su -s /bin/bash -c "gpg --list-keys" nginx
步骤 6. 配置 MariaDB。
默认情况下,MariaDB 未加固。mysql_secure_installation您可以使用脚本保护 MariaDB 。您应该仔细阅读下面的每个步骤,这些步骤将设置 root 密码、删除匿名用户、禁止远程 root 登录、删除测试数据库和访问安全 MariaDB:
mysql_secure_installation
像这样配置它:
- Set root password? [Y/n] y
- Remove anonymous users? [Y/n] y
- Disallow root login remotely? [Y/n] y
- Remove test database and access to it? [Y/n] y
- Reload privilege tables now? [Y/n] y
接下来,我们需要登录 MariaDB 控制台并为 Passbolt 创建一个数据库。运行以下命令:
mysql -u root -p
这将提示您输入密码,因此请输入您的 MariaDB 根密码并按 Enter。登录到数据库服务器后,您需要为 Passbolt 安装创建数据库:
MariaDB [(none)]> CREATE DATABASE passbolt_db;
MariaDB [(none)]> CREATE USER 'passbolt'@'localhost' IDENTIFIED BY 'your-strong-password';
MariaDB [(none)]> GRANT ALL PRIVILEGES ON passbolt_db.* TO 'passbolt'@'localhost' IDENTIFIED BY 'your-strong-password' WITH GRANT OPTION;
MariaDB [(none)]> ALTER DATABASE passbolt_db charset=utf8;
MariaDB [(none)]> FLUSH PRIVILEGES;
MariaDB [(none)]> EXIT;
步骤 7. 为 Passbolt 配置 Nginx。
现在我们为 Passbolt 创建一个 Nginx 配置文件:
export PASSBOLT=/var/www/passbolt/
cd $PASSBOLT
cp config/passbolt.default.php config/passbolt.php
nano config/passbolt.php
fullBaseUrl使用您的 Passbolt 域名更改 ‘ ‘ 选项:
'App' => [
        // comment
        'fullBaseUrl' => 'https://pass.your-domain.com',
        // comment..
    ],
接下来,更改数据库配置:
  // Database configuration.
    'Datasources' => [
        'default' => [
            'host' => 'localhost',
            //'port' => 'non_standard_port_number',
            'username' => 'passbolt',
            'password' => 'your-strong-password',
            'database' => 'passbolt_db',
        ],
    ],
之后,复制并粘贴您的 GPG 指纹并取消注释“公共”和“私人”选项:
gpg' => [
            //
            // COMMENT REMOVED
            //
            'serverKey' => [
                // Server private key fingerprint.
                'fingerprint' => '38E3736DD02860F8CBA57BB99C8B82A2C3A69BMW',
                'public' => CONFIG . 'gpg' . DS . 'serverkey.asc',
                'private' => CONFIG . 'gpg' . DS . 'serverkey_private.asc',
            ],
保存并关闭文件,然后创建一个新的 Nginx 服务器块配置:
nano /etc/nginx/conf.d/passbolt.conf
添加以下文件:
server {
    listen 80;

    server_name pass.your-domain.com;

    return 302 https://$server_name$request_uri;
}

server {
  listen 443 ssl http2;

  server_name pass.your-domain.com;
  root /var/www/passbolt;

  ssl_certificate /etc/letsencrypt/live/pass.your-domain.com/fullchain.pem;
  ssl_certificate_key /etc/letsencrypt/live/pass.your-domain.com/privkey.pem;

  ssl_protocols TLSv1.2;
  ssl_prefer_server_ciphers on;
  ssl_ciphers ECDHE-RSA-AES256-GCM-SHA512:DHE-RSA-AES256-GCM-SHA512:ECDHE-RSA-AES256-GCM-SHA384:DHE-RSA-AES256-GCM-SHA384:ECDHE-RSA-AES256-SHA384;
  ssl_ecdh_curve secp384r1; # Requires nginx >= 1.1.0
  ssl_session_timeout  10m;
  ssl_session_cache shared:SSL:10m;
  ssl_session_tickets off; # Requires nginx >= 1.5.9
  # ssl_stapling on; # Requires nginx >= 1.3.7
  # ssl_stapling_verify on; # Requires nginx => 1.3.7
  resolver 8.8.8.8 8.8.4.4 valid=300s;
  resolver_timeout 5s;
  add_header X-Frame-Options DENY;
  add_header X-Content-Type-Options nosniff;
  add_header X-XSS-Protection "1; mode=block";

  location / {
    try_files $uri $uri/ /index.php?$args;
    index index.php;
  }

  location ~ \.php$ {
    fastcgi_index           index.php;
    fastcgi_pass            unix:/var/run/php-fpm/www.sock;
    fastcgi_split_path_info ^(.+\.php)(.+)$;
    include                 fastcgi_params;
    fastcgi_param           SCRIPT_FILENAME $document_root$fastcgi_script_name;
    fastcgi_param           SERVER_NAME $http_host;
  }

  location ~* \.(jpe?g|woff|woff2|ttf|gif|png|bmp|ico|css|js|json|pdf|zip|htm|html|docx?|xlsx?|pptx?|txt|wav|swf|svg|avi|mp\d)$ {
    access_log off;
    log_not_found off;
    try_files $uri /webroot/$uri /index.php?$args;
  }
}
保存并关闭文件,然后重新启动 Nginx 服务以使更改生效:
nginx -t
sudo systemctl restart nginx
最后,使用以下命令开始 Passbolt 安装:
cd /var/www/passbolt
sudo su -s /bin/bash -c "./bin/cake passbolt install" nginx
您应该得到以下输出:
---------------------------------------------------------------
User saved successfully.
To start registration follow the link provided in your mailbox or here:
https://pass.your-domain.com/setup/install/f82227bc-b0b6-bmw-99a7-6b490a4ba262/5a112de0-e46-4e1b-97c8-26453ef120
步骤 8. 配置防火墙。
允许防火墙使用 HTTP 和 HTTPS 并使用以下命令重新加载它:
sudo firewall-cmd --permanent --zone=public --add-service=http
sudo firewall-cmd --permanent --zone=public --add-service=https
sudo firewall-cmd --reload
步骤 9. 访问 Passbolt Web 界面。
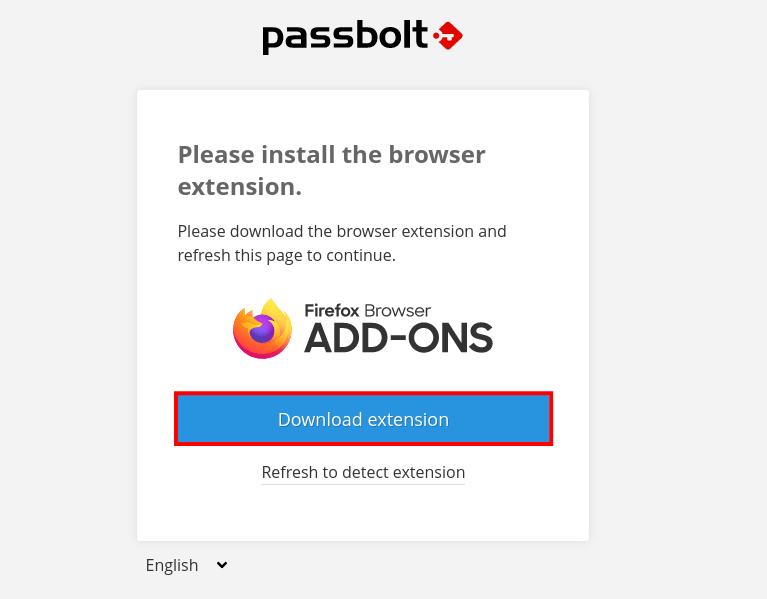
成功安装后,打开 Web 浏览器并使用 URL 访问 Passbolt 。您将被重定向到以下页面:https://pass.your-domain.com/setup/install/f82227bc-b0b6-bmw-99a7-6b490a4ba262/5a112de0-e46-4e1b-97c8-26453ef120

感谢您使用本教程在您的 AlmaLinux 8 系统上安装 Passbolt 密码管理器。如需更多帮助或有用信息,我们建议您查看Drupal 官方网站。