Asterisk 是一个用于构建通信应用程序的免费开源框架,由 Sangoma 赞助。Asterisk 为 IP PBX 系统、VoIP 网关和会议服务器提供支持,以创建 VoIP 系统。它具有各种功能,可以根据需要进行 VoIP 通信。
在 AlmaLinux 8 上安装星号
步骤 1. 首先,让我们先确保您的系统是最新的。
sudo dnf update
sudo dnf install epel-release
sudo dnf config-manager --set-enabled powertools
sudo dnf group install "Development Tools"
sudo dnf install git wget vim net-tools sqlite-devel psmisc ncurses-devel libtermcap-devel newt-devel libxml2-devel libtiff-devel gtk2-devel libtool libuuid-devel subversion kernel-devel kernel-devel-$(uname -r) crontabs cronie-anacron libedit libedit-devel
步骤 2. 在 CentOS 系统上禁用 SELinux。
通过运行以下命令将 SELinux 设置为 Permissive 模式:
sudo setenforce 0
sudo sed -i 's/\(^SELINUX=\).*/\SELINUX=permissive/' /etc/selinux/config
步骤 3. 设置主机名。
使用以下命令为您的系统设置静态主机名:
sudo hostnamectl set-hostname asterisk.idroot.us
接下来,我们需要为我们的系统设置正确的时区:
sudo timedatectl set-timezone Indonesia/Jakarta
步骤 4. 安装 Jansson。
现在使用以下命令下载并安装 Jansson:
sudo git clone https://github.com/akheron/jansson.git
cd jansson
autoreconf -i
./configure --prefix=/usr/
make
sudo make install
步骤 5. 安装 PJSIP。
PJSIP 是一个免费的开源多媒体通信库,用 C 语言编写,实现了基于标准的协议,如 SIP、SDP、RTP、STUN、TURN 和 ICE。运行以下命令进行安装:
cd ~
git clone https://github.com/pjsip/pjproject.git
cd pjproject
./configure CFLAGS="-DNDEBUG -DPJ_HAS_IPV6=1" --prefix=/usr --libdir=/usr/lib64 --enable-shared --disable-video --disable-sound --disable-opencore-amr
make dep
make
sudo make install
sudo ldconfig
步骤 6. 在 AlmaLinux 8 上安装 Asterisk。
现在我们已经安装了所有依赖包,我们应该准备下载并安装 Asterisk:
cd ~
wget http://downloads.asterisk.org/pub/telephony/asterisk/asterisk-18-current.tar.gz
tar xvfz asterisk-18-current.tar.gz
cd asterisk-18*/
./configure --libdir=/usr/lib64
输出:
.....
configure: Menuselect build configuration successfully completed

               .$$$$$$$$$$$$$$$=..
            .$7$7..          .7$$7:.
          .$$:.                 ,$7.7
        .$7.     7$$$$           .$$77
     ..$$.       $$$$$            .$$$7
    ..7$   .?.   $$$$$   .?.       7$$$.
   $.$.   .$$$7. $$$$7 .7$$$.      .$$$.
 .777.   .$$$$$$77$$$77$$$$$7.      $$$,
 $$$~      .7$$$$$$$$$$$$$7.       .$$$.
.$$7          .7$$$$$$$7:          ?$$$.
$$$          ?7$$$$$$$$$$I        .$$$7
$$$       .7$$$$$$$$$$$$$$$$      :$$$.
$$$       $$$$$$7$$$$$$$$$$$$    .$$$.
$$$        $$$   7$$$7  .$$$    .$$$.
$$$$             $$$$7         .$$$.
7$$$7            7$$$$        7$$$
 $$$$$                        $$$
  $$$$7.                       $$  (TM)
   $$$$$$$.           .7$$$$$$  $$
     $$$$$$$$$$$$7$$$$$$$$$.$$$$$$
       $$$$$$$$$$$$$$$$.

configure: Package configured for:
configure: OS type  : linux-gnu
configure: Host CPU : x86_64
configure: build-cpu:vendor:os: x86_64 : pc : linux-gnu :
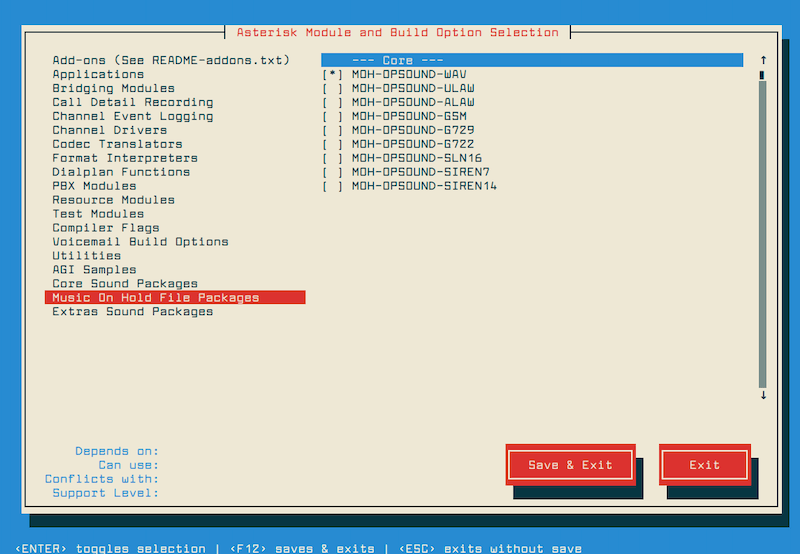
现在,让我们开始构建过程:
make menuselect

使用以下命令保存您的列表并将 mp3 解码器下载到源代码树中:
contrib/scripts/get_mp3_source.sh
接下来,构建并安装 Asterisk,如下所示:
make
sudo make install
sudo make samples
sudo make config
sudo ldconfig
步骤 7. 创建 Asterisk 用户并启动 Asterisk。
为星号服务创建一个组和用户,并使用以下命令分配适当的权限:
sudo groupadd asterisk
sudo useradd -r -d /var/lib/asterisk -g asterisk asterisk
sudo usermod -aG audio,dialout asterisk
sudo chown -R asterisk.asterisk /etc/asterisk /var/{lib,log,spool}/asterisk /usr/lib64/asterisk
然后,设置 Asterisk 默认用户:
sudo nano /etc/sysconfig/asterisk
添加以下文件:
AST_USER="asterisk"
AST_GROUP="asterisk"
另外,使用以下命令编辑文件:/etc/asterisk/asterisk.conf
sudo nano /etc/asterisk/asterisk.conf
添加以下命令:
runuser = asterisk ; The user to run as.
rungroup = asterisk ; The group to run as.
最后,重新启动 Asterisk 服务并在启动时启用它:
sudo systemctl restart asterisk
sudo systemctl enable asterisk
sudo systemctl status asterisk
通过运行以下命令验证您是否可以连接到 Asterisk CLI:
asterisk -rvv
感谢您使用本教程在您的 AlmaLinux 8 系统上安装 Asterisk。如需更多帮助或有用信息,我们建议您查看官方 Asterisk 网站。