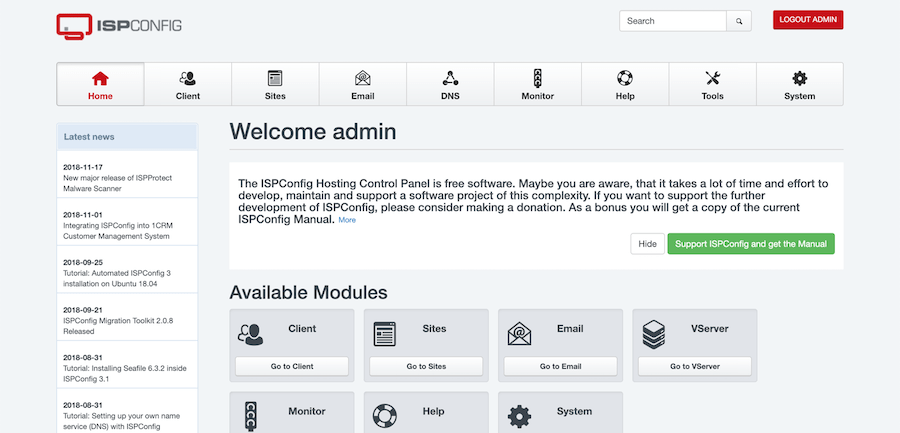
ISPConfig是Linux分销商的开源托管控制面板。它具有多种选项,可帮助您控制服务器并允许其他用户维护其网站。ISPConfig支持基于Linux的操作系统,如CentOS,Debian,Fedora和Ubuntu。
在 Ubuntu 22.04 LTS Jammy Jellyfish 上安装 ISPConfig
第 1 步。首先,通过在终端中运行以下命令,确保所有系统软件包都是最新的。apt
sudo apt update
sudo apt upgrade
sudo apt install lsb-release ca-certificates apt-transport-https software-properties-common
第 2 步。设置主机名。
现在编辑服务器安装主机名的文件:/etc/hostname
nano /etc/hostname
在我们的例子中,它应该只包含子域部分:
idroot
保存并关闭文件,然后您必须重新启动服务器才能应用此更改:
sudo systemctl reboot
在继续之前,我们将检查主机名是否正确:
hostname -f
输出:
root@idroot:~$ hostname -f
idroot.example.com
第 3 步。在 Ubuntu 22.04 上安装 ISPConfig。
默认情况下,ISPConfig 在 Ubuntu 22.04 基本存储库中不可用。现在运行以下命令将ISPConfig自动安装程序下载到您的系统:
wget -O - https://get.ispconfig.org | sh -s -- --help
几秒钟后,安装程序将确认安装ISPConfig。输入“”并按回车键:yes
WARNING! This script will reconfigure your complete server!
It should be run on a freshly installed server and all current configuration that you have done will most likely be lost!
Type 'yes' if you really want to continue:
安装成功完成后。您将看到ISPConfig管理员和MySQL根密码,如下所示:
[INFO] Your ISPConfig admin password is: m3iL4n4
[INFO] Your MySQL root password is: m4r1a82d0kafMwqGdts
此外,自动安装程序具有各种命令行选项来微调设置。例如,您可以在Apache和Nginx网络服务器之间进行选择,以及在系统上安装哪些服务。命令行参数为:
Usage: ispc3-ai.sh [] [...]

This script automatically installs all needed packages for an ISPConfig 3 setup using the guidelines from the "Perfect Server Setup" howtos on idroot.us.

Possible arguments are:
    --help          Show this help page
    --debug         Enable verbose logging (logs each command with the exit code)
    --channel       Choose the channel to use for ISPConfig. --channel=<stable|dev>
                    "stable" is the latest ISPConfig release available on www.ispconfig.org
                    "dev" is the latest stable-branch from the ISPConfig git repository: https://git.ispconfig.org/ispconfig/ispconfig3/tree/stable-3.1
                    -> The dev channel might contain bugs and less-tested features and should only be used in production by very experienced users.
    --lang          Use language for ISPConfig installation. Specify with --lang=en|de (only en (English) and de (German) supported currently).
    --interactive   Don't install ISPConfig in non-interactive mode. This is needed if you want to use expert mode, e. g. to install a slave server that shall be integrated into an existing
                    multiserver setup.
    --use-nginx     Use nginx webserver instead of apache2
    --use-amavis    Use amavis instead of rspamd for mail filtering
    --use-unbound   Use unbound instead of bind9 for local resolving. Only allowed if --no-dns is set.
    --use-php       Use specific PHP versions, comma separated, instead of installing multiple PHP, e.g. --use-php=7.4,8.0 (5.6, 7.0, 7.1, 7.2, 7.3, 7.4 and 8.0 available).
                    --use-php=system disables the sury repository and just installs the system's default PHP version.
                    ommiting the argument (use all versions)
    --use-ftp-ports This option sets the passive port range for pure-ftpd. You have to specify the port range separated by hyphen, e. g. --use-ftp-ports=40110-40210.
                    If not provided the passive port range will not be configured.
    --use-certbot   Use Certbot instead of acme.sh for issuing Let's Encrypt certificates. Not adviced unless you are migrating from a old server that uses Certbot.
    --no-web        Do not use ISPConfig on this server to manage webserver setting and don't install nginx/apache or pureftpd. This will also prevent installing an ISPConfig UI and implies
                    --no-roundcube as well as --no-pma
    --no-mail       Do not use ISPConfig on this server to manage mailserver settings. This will install postfix for sending system mails, but not dovecot and not configure any settings for
                    ISPConfig mail. It implies --no-mailman.
    --no-dns        Do not use ISPConfig on this server to manage DNS entries. Bind will be installed for local DNS caching / resolving only.
    --no-local-dns  Do not install local DNS caching / resolving via bind.
    --no-firewall   Do not install ufw and tell ISPConfig to not manage firewall settings on this server.
    --no-roundcube  Do not install roundcube webmail.
    --roundcube     Install Roundcube even when --no-mail is used. Manual configuration of Roundcube config is needed.
    --no-pma        Do not install PHPMyAdmin on this server.
    --no-mailman    Do not install Mailman mailing list manager.
    --no-quota      Disable file system quota
    --no-ntp        Disable NTP setup
    --unattended-upgrades
                    Install UnattendedUpgrades. You can add extra arguments for automatic cleanup and automatic reboots when necessary with --unattended-upgrades=autoclean,reboot (or only
                    one of them).
    --i-know-what-i-am-doing
                    Prevent the autoinstaller to ask for confirmation before continuing to reconfigure the server.
第 4 步。访问ISPConfig网页界面。
成功安装后,现在我们打开您的网络浏览器并使用 网址 .您将被重定向到ISPConfig登录页面:https://idroot.example.com:8080

感谢您使用本教程在 Ubuntu 22.04 LTS Jammy Jellyfish 系统上安装 ISPConfig 控制面板。有关其他帮助或有用信息,我们建议您查看ISPConfig网站。
© 版权声明
文章版权归作者所有,未经允许请勿转载。