Sails.js 是一个强大的 Javascript 框架,可以轻松构建 Node.js 应用程序。旨在类似于 Ruby on Rails 等框架的 MVC 架构,但支持更现代、面向数据的 Web 应用程序开发风格。Sails.js 凭借其强大的功能和易于使用的 API,是构建高质量 Node.js 应用程序的完美工具。
在 Rocky Linux 9 上安装 Sails.js 框架
步骤 1. 第一步是将您的系统更新到最新版本的软件包列表。为此,请运行以下命令:
sudo dnf check-update
sudo dnf install dnf-utils curl gcc-c++ make
步骤 2. 在 Rocky Linux 9 上安装 Node.js。
默认情况下,Rocky Linux 9 基础存储库中不提供 Node.js。现在运行以下命令将 NodeSource 存储库添加到您的系统:
curl -sL https://rpm.nodesource.com/setup_16.x | bash -
接下来,使用以下命令安装最新的 Node.js版本:
sudo dnf install nodejs
使用以下命令验证已安装的 Node.js 版本:
node -v
要验证 NPM 版本,请运行以下命令:
npm -v
步骤 3. 在 Rocky Linux 9 上安装 Sails.js。
npm现在我们使用以下命令安装 Sails.js :
sudo npm -g install sails
安装 Sails.js 后,您需要为 Sails.js 应用程序创建一个目录:
mkdir sails
cd sails
sails new idrootapp
您将被要求为您的应用程序选择模板:
Choose a template for your new Sails app:
 1. Web App  ·  Extensible project with auth, login, & password recovery
 2. Empty    ·  An empty Sails app, yours to configure
 (type "?" for help, or <CTRL+C> to cancel)
? 1
键入 1 并按 ENTER 键继续并完成“ idrootapp”创建:
info: Installing dependencies...
Press CTRL+C to cancel.
(to skip this step in the future, use --fast)
 info: Created a new Sails app `idrootapp`!
接下来,导航并启动“ idrootapp”以测试和验证:
cd idrootapp
sails lift
输出:
info: Starting app...

 info: Initializing project hook... (`api/hooks/custom/`)
 info: Initializing `apianalytics` hook...  (requests to monitored routes will be logged!)
 info: ·• Auto-migrating...  (alter)
 info:    Hold tight, this could take a moment.
 info:  ✓ Auto-migration complete.

debug: Running v0 bootstrap script...  (looks like this is the first time the bootstrap has run on this computer)
 info:
 info:                .-..-.
 info:
 info:    Sails              <|    .-..-.
 info:    v1.5.2              |\
 info:                       /|.\
 info:                      / || \
 info:                    ,'  |'  \
 info:                 .-'.-==|/_--'
 info:                 `--'-------'
 info:    __---___--___---___--___---___--___
 info:  ____---___--___---___--___---___--___-__
 info:
 info: Server lifted in `/root/sails/idrootapp`
 info: To shut down Sails, press  + C at any time.
 info: Read more at https://sailsjs.com/support.

debug: -------------------------------------------------------
debug: :: Mon July 28 2022 19:09:46 GMT+0000 (Coordinated Universal Time)

debug: Environment : development
debug: Port        : 1337
debug: -------------------------------------------------------
步骤 4. 为 Salis.js 创建一个 Systemd 服务。
现在我们systemd为 Salis.js 创建一个服务文件:
nano /lib/systemd/system/sails.service
添加以下行:
[Unit]
After=network.target

[Service]
Type=simple
User=root
WorkingDirectory=/var/www/idrootapp
ExecStart=/usr/bin/sails lift
Restart=on-failure

[Install]
WantedBy=multi-user.target
保存并关闭文件,然后重新加载systemd守护程序以应用更改:
sudo systemctl daemon-reload
sudo systemctl start sails
sudo systemctl enable sails
步骤 5. 将 Nginx 设置为 Sails.js 的反向代理。
首先,安装 Rocky Linux 9 上可用的 Nginx:
sudo dnf install nginx
接下来,使用以下命令创建一个 Nginx 虚拟主机配置文件:
nano /etc/nginx/conf.d/sails.conf
添加以下文件:
server {
 listen       80;
 server_name  sails.your-domain.com;
   location / {
     proxy_pass        http://localhost:1337/;
     proxy_set_header  Host $host;
     proxy_buffering   off;
   }
 }
保存并关闭文件,然后重新启动 Nginx 以应用更改:
nginx -t
sudo systemctl restart nginx
步骤 6. 配置防火墙规则。
允许防火墙使用 HTTP 和 HTTPS 并使用以下命令重新加载它:
sudo firewall-cmd --permanent --zone=public --add-service=http
sudo firewall-cmd --permanent --zone=public --add-service=https
sudo firewall-cmd --reload
步骤 7. 访问 Sails.js Web 界面。
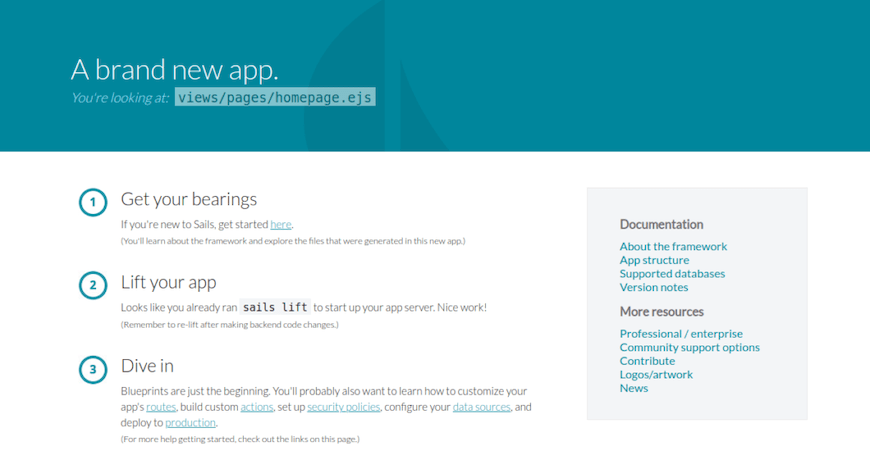
成功安装后,打开 Web 浏览器并使用 URL 访问 Sails.js Web 界面。您应该在以下屏幕上看到 Sails.js 默认页面:http://your-domain.com

感谢您使用本教程在 Rocky Linux 9 系统上安装 Sails.js MVC 框架。如需其他帮助或有用信息,我们建议您查看Sails.js 官方网站。