LEMP 是一个免费的开源 Web 开发平台,用于 Web 应用程序开发。LEMP 代表 Linux、Nginx (Engine-X)、MariaDB/MySQL 和 PHP,所有这些都是开源且免费使用的。它是支持动态网站和 Web 应用程序的最常见的软件Stack。
在 Windows 10 WSL 上安装 LEMP Stack
步骤 1. 为 Linux 2 启用 Windows 子系统。
在 Windows 上安装任何 Linux 发行版之前,您必须首先启用“适用于 Linux 的 Windows 子系统”可选功能。现在运行下面的命令来启用它:
以管理员身份打开 PowerShell 并运行:
dism.exe /online /enable-feature /featurename:Microsoft-Windows-Subsystem-Linux /all /norestart
步骤 2. 启用虚拟机功能。
在安装 WSL 2 之前,您必须启用虚拟机平台可选功能。您的机器将需要虚拟化功能才能使用此功能。
要在 Windows 10 (2004) 上启用虚拟机平台,请以管理员身份打开 PowerShell 并运行:
dism.exe /online /enable-feature /featurename:VirtualMachinePlatform /all /norestart
步骤 3. 将 WSL 2 设置为默认版本。
我们将 WSL 2 设置为默认值。现在以管理员身份打开 PowerShell 并运行此命令以将 WSL 2 设置为 WSL 的默认版本:
wsl --set-default-version 2
步骤 4. 安装 Ubuntu Linux 发行版。
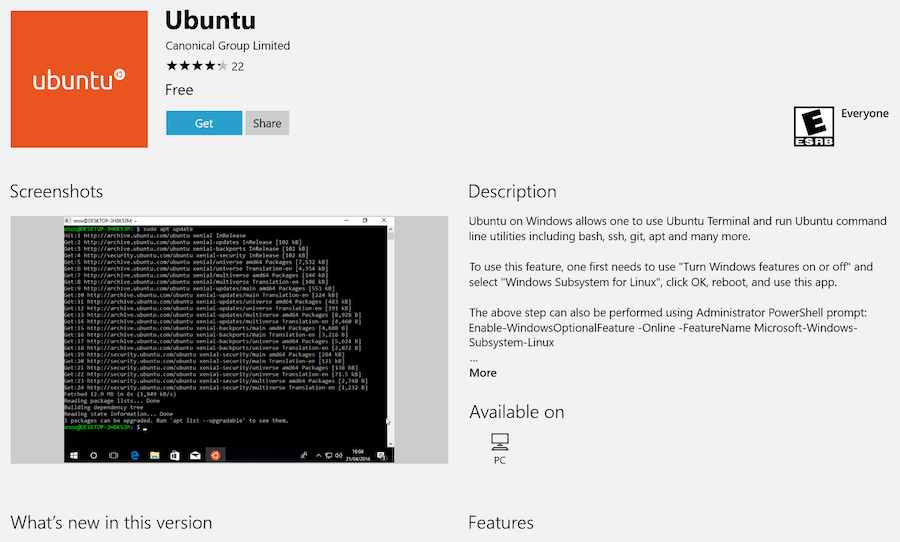
有了 WSL 和必要的虚拟化技术,您要做的就是从 Microsoft Store 中挑选并安装 Linux 发行版。有几个不同的发行版可用,包括 OpenSUSE、Pengwin、Fedora Remix 和 Alpine Linux。
要在 Windows 10 上安装 Ubuntu,请打开 Microsoft Store 应用程序,搜索“Ubuntu 20.04”,然后点击“获取”按钮:

步骤 5. 在 Windows WSL 上安装 Nginx。
要在 Ubuntu 服务器上安装 Nginx HTTP,请运行以下命令:
sudo apt update
sudo apt install nginx
安装成功后,运行以下命令停止和启动 Nginx 服务:
sudo service nginx stop
sudo service nginx start
接下来,通过访问您的服务器的 IP 地址来验证网络服务器是否正在运行并且可以访问:
http://localhost

步骤 6. 在 Windows WSL 上安装 MariaDB。
运行以下命令安装 MariaDB:
sudo apt install mariadb-server mariadb-client
完成后,运行以下命令以停止、启动和启用 MariaDB 服务以始终在服务器启动时启动:
sudo service mysql stop
sudo service mysql start
默认情况下,MariaDB 未加固。您可以使用mysql_secure_installation脚本保护 MariaDB 。您应该仔细阅读以下每个步骤,这些步骤将设置 root 密码、删除匿名用户、禁止远程 root 登录以及删除测试数据库和访问安全 MariaDB 的权限。
mysql_secure_installation
像这样配置它:
- Set root password? [Y/n] y
- Remove anonymous users? [Y/n] y
- Disallow root login remotely? [Y/n] y
- Remove test database and access to it? [Y/n] y
- Reload privilege tables now? [Y/n] y
使用以下命令登录到数据库控制台:
mysql -u root -p
步骤 7. 在 Windows 10 WSL 上安装 PHP。
现在运行以下命令来安装 PHP 和模块以支持 WordPress:
sudo apt install php-fpm php-common php-mysql php-gmp php-curl php-intl php-mbstring php-xmlrpc php-gd php-xml php-cli php-zip
接下来,运行以下命令停止和启动 PHP7.4 服务:
sudo service php7.4-fpm stop
sudo service php7.4-fpm start
安装 PHP 和相关模块后,运行以下命令以验证是否安装了 PHP:
php -v
步骤 8. 测试 PHP。
使用以下命令创建一个名为服务器默认主目录的测试 PHP 文件 :phpinfo.php
sudo nano /var/www/html/phpinfo.php
添加以下行:
<?php
phpinfo();
?>
接下来,打开 Nginx 默认配置文件并取消注释突出显示的行:
sudo nano /etc/nginx/sites-available/default
取消注释突出显示的行并保存文件:
# Default server configuration
#
server {
        listen 80 default_server;
        listen [::]:80 default_server;
        #
        # include snippets/snakeoil.conf;

        root /var/www/html;

        # Add index.php to the list if you are using PHP
        index index.php index.html index.htm index.nginx-debian.html;

        server_name _;

        location / {
                # First attempt to serve request as file, then
                # as directory, then fall back to displaying a 404.
                try_files $uri $uri/ =404;
        }

        # pass PHP scripts to FastCGI server
        #
        location ~ \.php$ {
               include snippets/fastcgi-php.conf;
        #
        #       # With php-fpm (or other unix sockets):
                fastcgi_pass unix:/var/run/php/php7.4-fpm.sock;
        #       # With php-cgi (or other tcp sockets):
        #       fastcgi_pass 127.0.0.1:9000;
        }

        # deny access to .htaccess files, if Apache's document root
        # concurs with nginx's one
        #
        #location ~ /\.ht {
}
重新启动 Nginx 服务以使更改生效:
sudo service nginx restart
此处应显示有关已安装 PHP 的信息:
http://127.0.0.1/info.php or http://localhost/info.php
感谢您使用本教程在 Ubuntu 20.04 LTS (Focal Fossa) 系统上的 Windows Subsystem for Linux 2 ( WSL 2 ) 上安装最新稳定版本的 LEMP Stack 。如需其他帮助或有用信息,我们建议您查看官方 Ubuntu 网站。